2. Simple Example
In this lab you will learn how to deploy a simple application using Argo CD.
Our lab setup consists of the following components:
- Git Server (Gitea ): https://gitea.training.cluster.acend.ch
- Argo CD Server: https://argocd.training.cluster.acend.ch
- Kubernetes Cluster
Task 2.1: Login to the Gitea and Clone the Repo
For this Training we’ve installed a Git Server under https://gitea.training.cluster.acend.ch
. We also forked the Argo CD Example Repo for your <username>.
Open your Webbrowser and navigate to https://gitea.training.cluster.acend.ch . Login with the training credentials provided by the trainer (Login Button is in the upper right corner).
Note
Users which have a personal Github account can just fork the Repository argocd-training-examples to their personal account. To fork the repository click on the top right of the Github on Fork.
The Git Repository is available under your Repositories
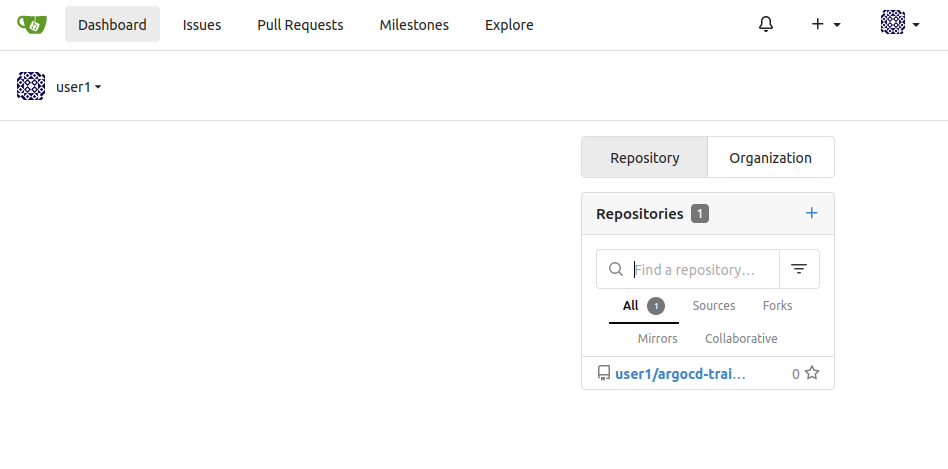
By clicking on the repository link in the repository list you get to the detail page.
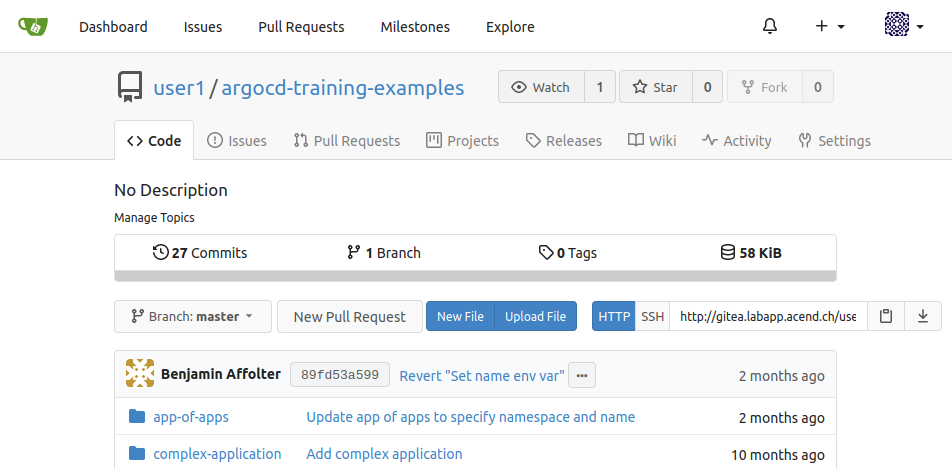
The URL of the Git repository, we’ll be working with, will look like https://gitea.training.cluster.acend.ch/<username>/argocd-training-examples.git.
Within the Web IDE we set the USER environment variable to your personal <username>.
Verify that with the following command:
echo $USER
The USER variable will be used as part of the commands to make the lab experience more comfortable for you.
Note
If you’re not using our lab webshell to execute the labs, make sure to set theUSER environment variable accordingly with the following command export USER=<username>Clone the forked repository to your local workspace:
git clone https://$USER@gitea.training.cluster.acend.ch/$USER/argocd-training-examples.git
… or the corresponding URL if you have choosen to use your own Git Server.
Change the working directory to the cloned git repository:
cd argocd-training-examples/example-app
When using the Web IDE: Configure the Git Client and verify the output
git config user.name "$USER"
git config user.email "$USER@gitea.training.cluster.acend.ch"
And we also want git to store our Password for the whole day so that we don’t need to login every single time we push something.
git config credential.helper 'cache --timeout=86400'
Then use the following command to verify whether the git config for username and email were correctly added:
git config --local --list
Task 2.2: Deploying the resources with Argo CD
Now we want to deploy the resource manifests contained in the cloned repository with Argo CD to demonstrate the basic features of Argo CD.
To deploy the resources using the Argo CD CLI use the following command:
argocd app create argo-$USER --repo https://gitea.training.cluster.acend.ch/$USER/argocd-training-examples.git --path 'example-app' --dest-server https://kubernetes.default.svc --dest-namespace $USER
Expected output: application 'argo-<username>' created
Note
We don’t need to provide Git credentials because the repository is readable for non-authenticated users as wellNote
If you want to deploy it in a different namespace, make sure the namespaces exists before synching the appOnce the application is created, you can view its status:
argocd app get argo-$USER
Project:            default
Server:             https://kubernetes.default.svc
Namespace:          <username>
URL:                https://argocd.training.cluster.acend.ch/applications/argo-<username>
Repo:               https://gitea.training.cluster.acend.ch/<username>/argocd-training-examples.git
Target:
Path:               example-app
SyncWindow:         Sync Allowed
Sync Policy:        <none>
Sync Status:        OutOfSync from  (5a6f365)
Health Status:      Missing

GROUP  KIND        NAMESPACE    NAME           STATUS     HEALTH   HOOK  MESSAGE
       Service     <username>  simple-example  OutOfSync  Missing
apps   Deployment  <username>  simple-example  OutOfSync  Missing
The application status is initially in OutOfSync state. To sync (deploy) the resource manifests, run:
argocd app sync argo-$USER
This command retrieves the manifests from the git repository and performs a kubectl apply on them. Because all our manifests has been deployed manually before, no new rollout of them will be triggered on Kubernetes. But form now on, all resources are managed by Argo CD. Congrats, the first step in direction GitOps! :)
You should see an output similar to the following lines:
TIMESTAMP                  GROUP        KIND   NAMESPACE  NAME            STATUS    HEALTH        HOOK  MESSAGE
2021-03-24T14:19:16+01:00            Service  <username>  simple-example  OutOfSync  Missing
2021-03-24T14:19:16+01:00   apps  Deployment  <username>  simple-example  OutOfSync  Missing
2021-03-24T14:19:16+01:00            Service  <username>  simple-example    Synced  Healthy

Name:               argo-<username>
Project:            default
Server:             https://kubernetes.default.svc
Namespace:          <username>
URL:                https://argocd.training.cluster.acend.ch/applications/argo-<username>
Repo:               https://gitea.training.cluster.acend.ch/<username>/argocd-training-examples.git
Target:
Path:               example-app
SyncWindow:         Sync Allowed
Sync Policy:        <none>
Sync Status:        Synced to  (5a6f365)
Health Status:      Progressing

Operation:          Sync
Sync Revision:      5a6f365d8a65d1dab0761fc0d32b90f7eb480354
Phase:              Succeeded
Start:              2021-03-24 14:19:16 +0100 CET
Finished:           2021-03-24 14:19:16 +0100 CET
Duration:           0s
Message:            successfully synced (all tasks run)

GROUP  KIND        NAMESPACE    NAME           STATUS  HEALTH       HOOK  MESSAGE
       Service     <username>  simple-example  Synced  Healthy            service/simple-example created
apps   Deployment  <username>  simple-example  Synced  Progressing        deployment.apps/simple-example created
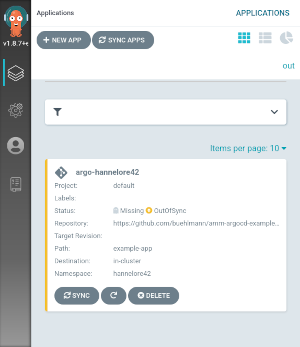
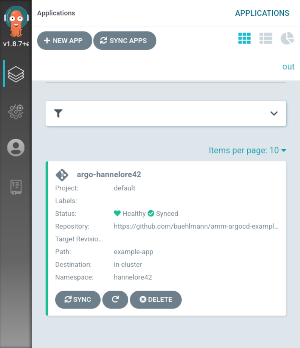
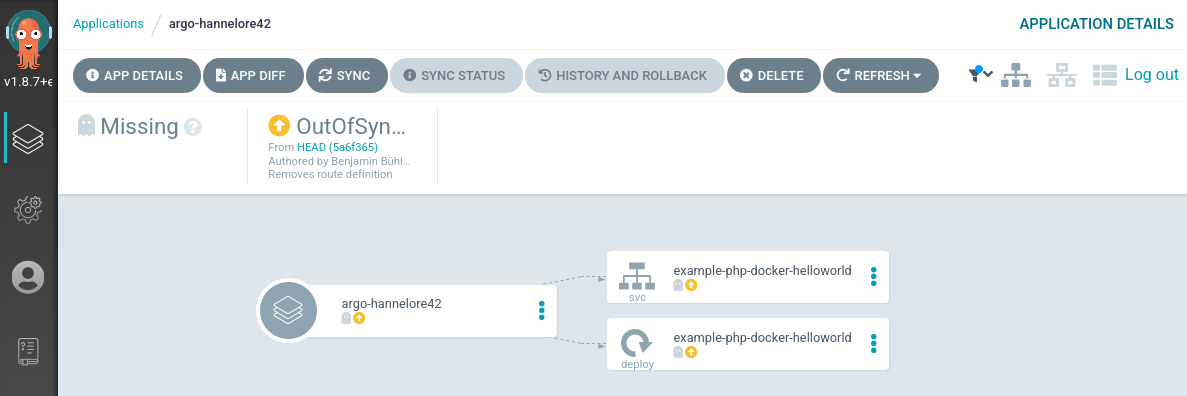
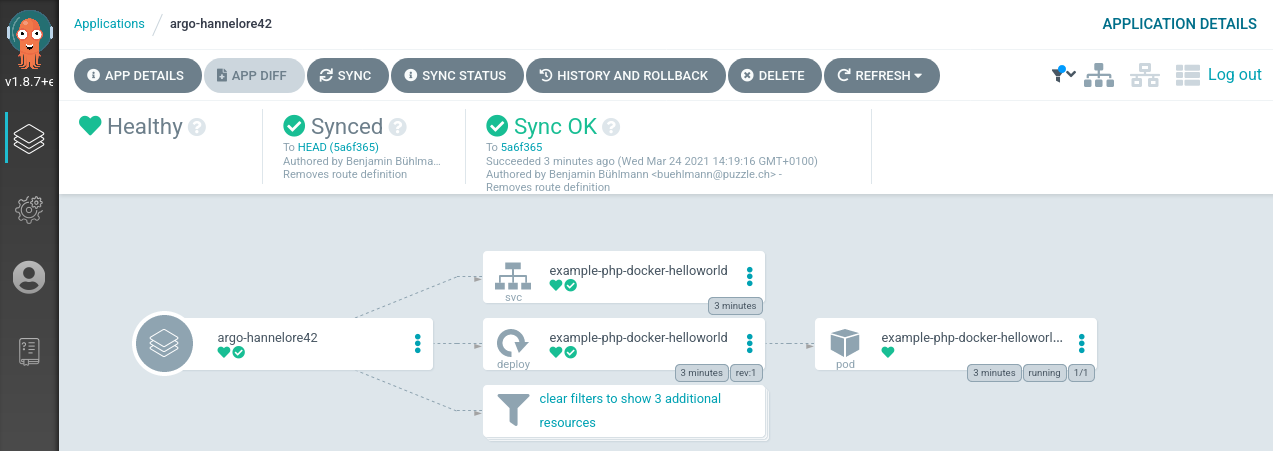
Check the Argo CD UI to browse the application and their components. The URL of the Argo CD webinterface will be provided by the teacher.
Application overview in unsynced and synced state
Detailed view of a application in unsynced and synced state
Task 2.3: Automated Sync Policy and Diff
When there is a new commit in your Git repository, the Argo CD application becomes OutOfSync. Let’s assume we want to scale up our Deployment of the example application from 1 to 2 replicas. We will change this in the Deployment manifest.
Increase the number of replicas in your file <workspace>/example-app/deployment.yaml to 2.
apiVersion: apps/v1
kind: Deployment
metadata:
  name: simple-example
spec:
  replicas: 2
  revisionHistoryLimit: 3
  selector:
    matchLabels:
      app: simple-example
  template:
    metadata:
      labels:
        app: simple-example
    spec:
      containers:
      - image: quay.io/acend/example-web-go
        name: simple-example
        ports:
        - containerPort: 5000
Commit the changes and push them to your personal remote Git repository. After the Git push command a password input field will appear at the top of the Web IDE.
git add .
git commit -m "Increased replicas to 2"
git push
After a successful push you should see the following output
Enumerating objects: 7, done.
Counting objects: 100% (7/7), done.
Delta compression using up to 8 threads
Compressing objects: 100% (4/4), done.
Writing objects: 100% (4/4), 367 bytes | 367.00 KiB/s, done.
Total 4 (delta 3), reused 0 (delta 0), pack-reused 0
remote: Resolving deltas: 100% (3/3), completed with 3 local objects.
To https://gitea.training.cluster.acend.ch/<username>/argocd-training-examples.git
   5a6f365..e2d4bbf  master -> master
Check the state of the resources by cli:
argocd app get argo-$USER --refresh
The parameter --refresh triggers an update against the Git repository. Out of the box Git will be polled by Argo CD in a predefined interval (defaults to 3 minutes). To use a synchronous workflow you can use webhooks in Git. These will trigger a synchronization in Argo CD on every push to the repository.
You will see that the Deployment is now OutOfSync:
Name:               argo-<username>
Project:            default
Server:             https://kubernetes.default.svc
Namespace:          <username>
URL:                https://argocd.training.cluster.acend.ch/applications/argo-<username>
Repo:               https://gitea.training.cluster.acend.ch/<username>/argocd-training-examples.git
Target:
Path:               example-app
SyncWindow:         Sync Allowed
Sync Policy:        <none>
Sync Status:        OutOfSync from  (e2d4bbf)
Health Status:      Healthy

GROUP  KIND        NAMESPACE    NAME            STATUS     HEALTH   HOOK  MESSAGE
       Service     <username>   simple-example  Synced     Healthy        service/simple-example created
apps   Deployment  <username>   simple-example  OutOfSync  Healthy        deployment.apps/simple-example created
When an application is OutOfSync then your deployed ’live state’ is no longer the same as the ’target state’ which is represented by the resource manifests in the Git repository. You can inspect the differences between live and target state by cli:
argocd app diff argo-$USER
which should give you an output similar to:
===== apps/Deployment <username>/simple-example ======
101c102
<   replicas: 1
---
>   replicas: 2
Now open the web console of Argo CD and go to your application. The deployment simple-example is marked as ‘OutOfSync’:
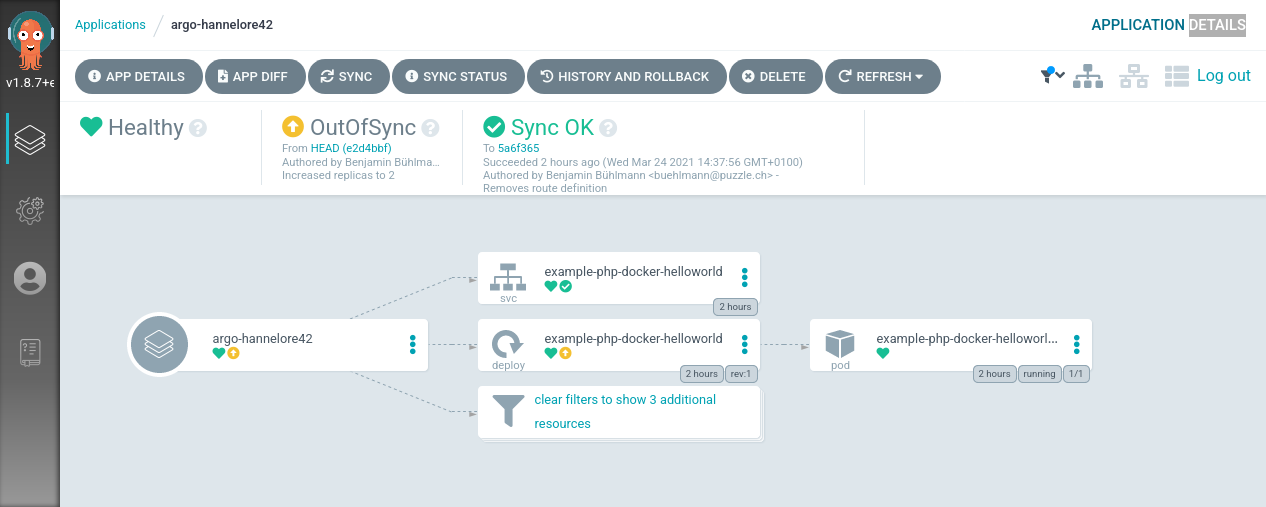
With a click on Deployment > Diff you will see the differences:
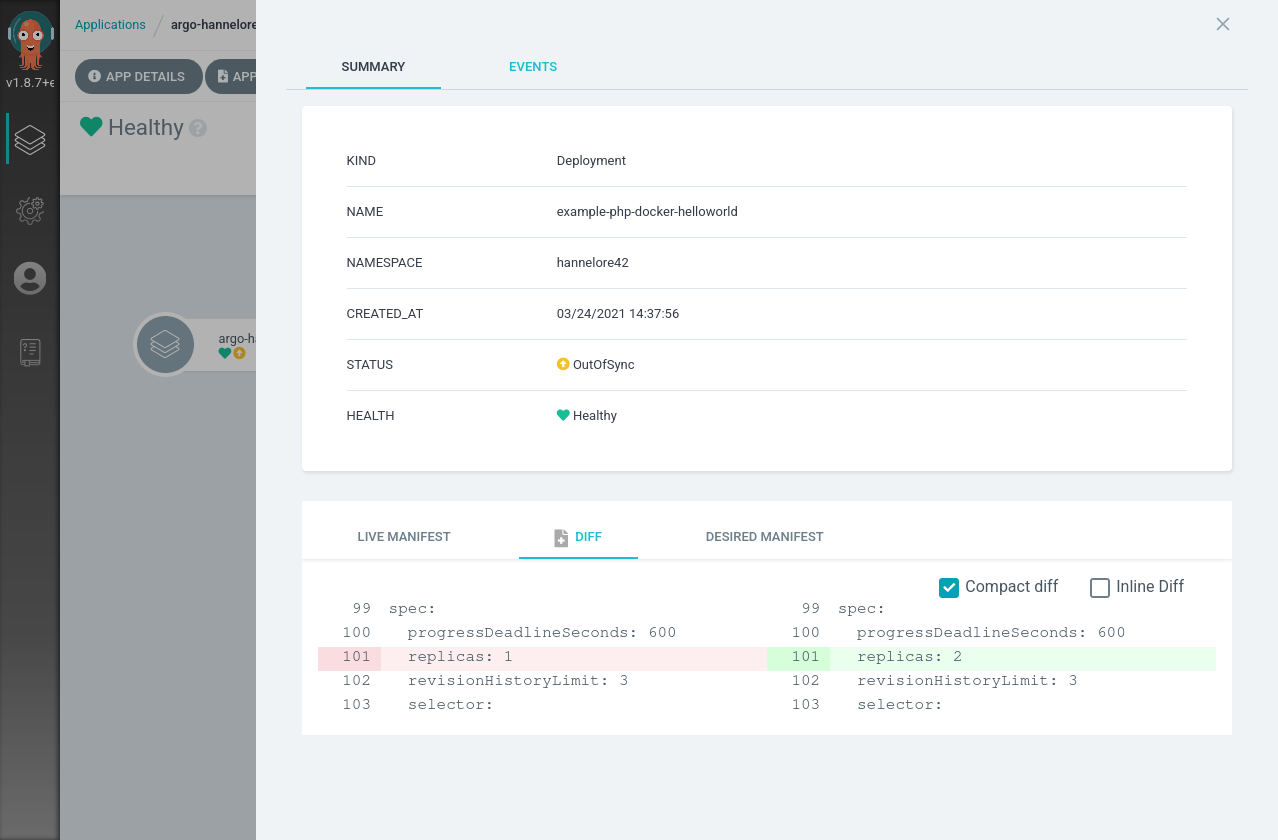
Now click Sync on the top left and let the magic happens ;) The application will be scaled up to 2 replicas and the resources are in Sync again.
Double-check the status by cli
argocd app get argo-$USER
Name:               argo-<username>
Project:            default
Server:             https://kubernetes.default.svc
Namespace:          <username>
URL:                https://argocd.training.cluster.acend.ch/applications/argo-<username>
Repo:               https://gitea.training.cluster.acend.ch/<username>/argocd-training-examples.git
Target:
Path:               example-app
SyncWindow:         Sync Allowed
Sync Policy:        <none>
Sync Status:        Synced to  (e2d4bbf)
Health Status:      Healthy

GROUP  KIND        NAMESPACE    NAME            STATUS  HEALTH   HOOK  MESSAGE
       Service     <username>   simple-example  Synced  Healthy        service/simple-example unchanged
apps   Deployment  <username>   simple-example  Synced  Healthy        deployment.apps/simple-example configured
Argo CD can automatically sync an application when it detects differences between the desired manifests in Git, and the live state in the cluster. A benefit of automatic sync is that CI/CD pipelines no longer need direct access to the Argo CD API server to perform the deployment. Instead, the pipeline makes a commit and push to the Git repository with the changes to the manifests in the tracking Git repo.
To configure automatic sync run (or use the UI):
argocd app set argo-$USER --sync-policy automated
From now on Argo CD will automatically apply all resources to Kubernetes every time you commit to the Git repository.
Decrease the replicas count to 1 and push the updated manifest to remote. Wait for a few moments and see check that ArgoCD will scale the deployment of the example app down to 1 replica. The default polling interval is 3 minutes. If you don’t want to wait you can force a refresh by clicking Refresh in the UI or by cli:
argocd app get argo-$USER --refresh
Task 2.4: Automatic Self-Healing
By default, changes made to the live cluster will not trigger automatic sync. To enable automatic sync when the live cluster’s state deviates from the state defined in Git, run:
argocd app set argo-$USER --self-heal
Watch the deployment simple-example in a separate terminal
kubectl get deployment simple-example --watch --namespace=$USER
Let’s scale our simple-example Deployment and observe whats happening:
kubectl scale deployment simple-example --replicas=3 --namespace=$USER
Argo CD will immediately scale back the simple-example Deployment to 1 replicas. You will see the desired replicas count in the watched Deployment.
NAME             READY   UP-TO-DATE   AVAILABLE   AGE
simple-example   1/1     2            2           114m
simple-example   1/3     2            2           114m
simple-example   1/3     2            2           114m
simple-example   1/3     2            2           114m
simple-example   1/3     3            2           114m
simple-example   1/1     3            2           114m
simple-example   1/1     3            2           114m
simple-example   1/1     3            2           114m
simple-example   1/1     2            2           114m
This is a great way to enforce a strict GitOps principle. Changes which are manually made on deployed resource manifests are reverted immediately back to the desired state by the ArgoCD controller.
Task 2.5: Expose Application
This is an optional task.
To expose an application we need to specify a so called ingress resource. Create an ingress.yaml file next to the deployment.yaml in the example-app directory with the following content.
---
apiVersion: networking.k8s.io/v1
kind: Ingress
metadata:
  name: simple-example
spec:
  rules:
    - host: simple-example-<username>.training.cluster.acend.ch
      http:
        paths:
          - path: /
            pathType: Prefix
            backend:
              service:
                name: simple-example
                port:
                  number: 5000
  tls:
  - hosts:
    - simple-example-<username>.training.cluster.acend.ch
Commit and Push the changes again, like you did before:
git add .
git commit -m "Expose application"
git push
After ArgoCD syncs the changes, you can access the example applications url: https://simple-example-<username>.training.cluster.acend.ch
Verify using the following command:
curl https://simple-example-$USER.training.cluster.acend.ch
The result should look similar to this:
<h1 style=color:#e81198>Hello golang</h1><h2>ID: e81198</h2>
Task 2.6: Pruning
You probably asked yourself how can I delete deployed resources on the container platform? Argo CD can be configured to delete resources that no longer exist in the Git repository.
First delete the files service.yaml and ingress.yaml from Git repository and push the changes
git add .
git add --all && git commit -m 'Removes service and ingress' && git push
Check the status of the application with
argocd app get argo-$USER --refresh
You will see that even with auto-sync and self-healing enabled the status is still OutOfSync
GROUP              KIND        NAMESPACE  NAME            STATUS     HEALTH   HOOK  MESSAGE
networking.k8s.io  Ingress     <username> simple-example  OutOfSync  Healthy        ingress.networking.k8s.io/simple-example created
                   Service     <username> simple-example  OutOfSync  Healthy
apps               Deployment  <username> simple-example  Synced     Healthy
Now enable the auto pruning explicitly:
argocd app set argo-$USER --auto-prune
Recheck the status again
argocd app get argo-$USER --refresh
GROUP       KIND        NAMESPACE  NAME            STATUS     HEALTH   HOOK  MESSAGE
extensions  Ingress     <username> simple-example  Succeeded  Pruned         pruned
            Service     <username> simple-example  Succeeded  Pruned         pruned
apps        Deployment  <username> simple-example  Synced     Healthy        deployment.apps/simple-example unchanged
The Service was successfully deleted by Argo CD because the manifest was removed from git. See the HEALTH and MESSAGE of the previous console output.
Task 2.7: State of ArgoCD
Argo CD is largely built stateless. The configuration is persisted as native Kubernetes objects. And those are stored in Kubernetes etcd. There is no additional storage layer needed to run ArgoCD. The Redis storage under the hood acts just as a throw-away cache and can be evicted anytime without any data loss.
The configuration changes made on ArgoCD objects through the UI or by cli tool argocd are reflected in updates of the ArgoCD Kubernetes objects Application and AppProject in the argocd namespace.
Let’s list all Kubernetes objects of type Application (short form: app)
kubectl get applications --namespace=argocd
NAME               SYNC STATUS   HEALTH STATUS
argo-<username>    Synced        Healthy
You will see the application which we created some chapters ago by cli command argocd app create.... To see the complete configuration of the Application as yaml use:
kubectl get applications argo-$USER -oyaml --namespace=argocd
You even can edit the Application resource by using:
kubectl edit applications argo-$USER --namespace=argocd
This allows us to manage the ArgoCD application definitions in a declarative way as well. It is a common pattern to have one ArgoCD application which references n child Applications which allows us a fast bootstrapping of a whole environment or a new cluster. This pattern is well known as the App of apps pattern.
Task 2.8: Accessing a private Git repository
The Git repository we have imported to Gitea is public available for the whole world. When accessing a private repository we have to provide credentials in form of a username/password pair or a ssh private key. In this task you will learn how to access a protected repo from Argo CD.
First make the Git repository in Gitea private by checking the option Visibility: Make Repository Private under Settings -> Repository. Now sync the app again.
argocd app sync argo-$USER
You will see the following error
FATA[0000] rpc error: code = FailedPrecondition desc = authentication required
Argo CD can’t any longer access the protected repository without providing credentials for authentication. Next assign credentials to used Git repository. You have to provide the Gitea password interactively.
argocd repo add https://gitea.training.cluster.acend.ch/$USER/argocd-training-examples.git --username $USER
Note
You can provide the password through the cli by using the flag--password.Now the sync should work. Argo CD use the configured credentials to authenticate against your repository in Gitea.
argocd app sync argo-$USER
You can define credential templates when using the same credential for multiple Git repositories. The configured credentials are used for each Git repository beginning with the configured URL. The following command will create a credential which matches all git repositories for your username (e.g. https://<username>@gitea.training.cluster.acend.ch/<username>)
argocd repocreds add https://gitea.training.cluster.acend.ch/$USER --username $USER
Finally make your personal Git repository public again for the following labs. Uncheck the option Visibility: Make Repository Private under Settings -> Repository in the Gitea UI.
Note
TLS certificates and SSH private keys are supported alternative authentication methods by Argo CD. Proxy support can be configured as well in the repository settings.Have a look in the documentation for detailed information about accessing private repositories.
Task 2.9: Delete the Application
You can cascading delete the ArgoCD Application with the following command:
argocd app delete argo-$USER
Hit y to confirm the deletion and this will delete the Application manifests of ArgoCD and all created resources by this application. In our case the Application, Deployment and Service will be deleted. With the flag --cascade=false only the ArgoCD Application will be deleted and the created resources Deployment and Service remain untouched.